

Snap Circuits Jr. Instruction Manual: A Comprehensive Guide
This comprehensive guide details 204 projects, teaching electric circuit fundamentals, with PDF access to projects 306-511. Explore the Snap Circuits world!
Snap Circuits Jr. offers an engaging, hands-on introduction to electronics for young learners. This kit utilizes a unique snap-together building system, eliminating the need for soldering or tools. Explore fundamental concepts like circuits, resistors, and LEDs through 100+ exciting projects. The included instruction manual, available as a PDF, guides users step-by-step. It’s a fantastic way to spark curiosity and build a solid foundation in electrical engineering principles, fostering creativity and problem-solving skills.
Understanding the Components
Snap Circuits Jr. components are easily identifiable and designed for safe, intuitive learning. The kit includes a base grid, resistors, LEDs, wires, and specialized parts like photoresistors (Q4). Each component has a specific function within a circuit, detailed in the instruction manual. Understanding these parts – their symbols and roles – is crucial for successful project building and troubleshooting. The SC-100 parts list provides a clear inventory for easy identification.
Identifying the Parts List (SC-100)
The SC-100 Snap Circuits Jr. kit includes a detailed parts list within the instruction manual. This list visually displays each component, noting its unique identification number. Key components include the base grid, various resistors, LEDs, and connecting wires. Familiarizing yourself with this list ensures you have all necessary parts before starting a project, preventing frustration and promoting a smooth building experience. A clear layout aids quick component location.
Component Functionality: Resistors, LEDs, and More
Snap Circuits Jr. components each serve a specific purpose. Resistors limit electrical flow, LEDs emit light when current passes, and the photoresistor (Q4) reacts to light intensity. Understanding these functions is crucial for grasping circuit behavior. The manual details how each part interacts, enabling experimentation and deeper learning. Proper component use ensures safe and effective circuit construction.
Setting Up Your Snap Circuits Jr. Kit
Preparing your Snap Circuits Jr. kit is simple! Begin by locating the base grid, which serves as the foundation for all projects. Remember that two AA batteries (not included) are required to power your circuits. Ensure a clear workspace and familiarize yourself with the component layout. Refer to the instruction manual for visual guidance during setup.
Installing Batteries (AA Batteries Required)
Powering your Snap Circuits Jr. requires two AA batteries, which are not included with the kit. Locate the power source block and carefully open the battery compartment. Insert the batteries, ensuring correct polarity as indicated inside the compartment. A secure fit is crucial for reliable operation. Close the compartment firmly before beginning your projects!
The Base Grid: Foundation of Your Circuits
The base grid serves as the central hub for all your Snap Circuits Jr. creations. This large, clear plastic foundation provides the structure to connect components securely. Parts simply “snap” onto the grid’s snaps, establishing electrical connections. Proper component placement on the grid is vital for successful circuit building and project completion.
Building Basic Circuits
Embark on your electronic journey with Projects 1-30, a simple introduction to circuitry. These foundational builds demonstrate core concepts like current flow and component interaction. Understanding how circuits function – whether in series or parallel – is crucial. Refer to pages 8-44 of the instruction manual for initial project ideas and guidance.
Begin your exploration with the first thirty projects, designed as a gentle introduction to electronic principles. These builds focus on fundamental concepts, utilizing basic components like resistors and LEDs. The instruction manual provides clear, step-by-step diagrams for each project, ensuring a smooth learning experience. Discover how simple arrangements create functional circuits!
Understanding Series and Parallel Circuits
Delve into the core concepts of series and parallel circuits, crucial for grasping electrical flow. The manual illustrates how components connect in each configuration, impacting current and resistance. Experiment with arranging parts differently – the manual notes arrangements can vary without altering the circuit’s function. Observe the effects firsthand!
Intermediate Projects: Expanding Your Knowledge
Embark on projects 31-100, venturing into sound and light applications. Discover how to utilize the photoresistor (Q4), responding to light changes by connecting it across points X and Y with a 1-snap wire. Explore diverse arrangements, as the manual emphasizes flexibility in component placement without impacting circuit functionality.
Projects 31-100: Exploring Sound and Light
Delve into a captivating range of projects focusing on audible tones and visual effects. These experiments build upon foundational knowledge, introducing more complex interactions between components. Expect to encounter circuits that produce sounds and illuminate LEDs, showcasing practical applications of electrical principles. Refer to pages 8-44 of the instruction manual for inspiration!
Using the Photoresistor (Q4)
The photoresistor (Q4) reacts to light intensity, altering circuit behavior. Experiment by connecting it across points X and Y with a 1-snap wire. Observe how covering and uncovering the photoresistor impacts the circuit’s function. This component demonstrates light-sensitive control, a key concept in many electronic applications. Explore its versatility!
Advanced Projects: Challenging Your Skills
Dive into projects 101-204, featuring complex circuit designs that push your understanding. Explore the functionality of transistors and integrated circuits, building upon foundational knowledge. These projects demand careful attention to detail and component placement. Successfully completing these challenges unlocks a deeper grasp of electronic principles and circuit building!
Projects 101-204: Complex Circuit Designs

These advanced projects introduce intricate circuit layouts, demanding precise component connections. Expect to encounter more sophisticated applications of resistors, LEDs, and integrated circuits. Carefully follow the diagrams, ensuring correct placement for optimal functionality. Successfully building these circuits solidifies your understanding of advanced electronic concepts and problem-solving skills.
Exploring Transistors and Integrated Circuits
Delve into the world of semiconductors with transistors, acting as electronic switches and amplifiers within circuits. Integrated circuits (ICs) pack numerous components into a single chip, enabling complex functions. These projects demonstrate how these components control and manipulate electrical signals, expanding your circuit-building capabilities. Understand their roles for advanced designs!
Troubleshooting Common Issues
Encountering problems? A non-working circuit often stems from loose snaps, incorrect component placement, or depleted batteries. Carefully review your connections against the project diagram. Inspect components for damage and ensure proper orientation. Replacing faulty parts is sometimes necessary; identify issues systematically to restore functionality and continue learning!

Circuit Not Working? Common Mistakes
Frustrated with a failed circuit? Common errors include improperly snapped connections – ensure a firm click! Double-check component direction, as some have polarity. Verify battery installation and charge. Review the diagram meticulously, comparing it to your build. Loose snaps and incorrect parts are frequent culprits, hindering circuit completion.
Identifying and Replacing Faulty Components
Suspect a broken part? Visually inspect components for damage – cracks, burns, or loose connections. Test LEDs by directly connecting them to a battery (with a resistor!). If a component fails, carefully note its number and function. Replacement parts can often be sourced online or from electronics retailers, ensuring continued project success.
Safety Precautions
Always prioritize safety! Use only the recommended AA batteries and ensure correct polarity. Never connect the Snap Circuits to a wall outlet. Handle components with care, avoiding excessive force. Supervise children during use. Disconnect the power when making changes. Follow all instructions in the manual for a safe and enjoyable experience.
Battery Safety Guidelines
Always use two AA batteries for power, ensuring correct polarity as indicated. Never mix old and new batteries, or different battery types. Remove batteries when the kit is not in use for extended periods. Do not attempt to recharge non-rechargeable batteries. Dispose of used batteries responsibly, following local regulations.
Proper Component Handling
Handle all Snap Circuits components with care to avoid damage. Avoid bending or breaking the snaps, as this can affect circuit connections. Do not force components together; ensure proper alignment. Store components in a safe, dry place when not in use. Inspect parts regularly for any signs of wear or damage.
Accessing the Instruction Manual
Access the Snap Circuits Jr. instruction manual in multiple formats for convenient learning. Download the PDF version for offline viewing and printing. Explore online resources and support forums for additional guidance and project ideas. Find diagrams and images available in the original online manual. Dive into the world of Snap Circuits!
Downloading the PDF Manual

Obtain the Snap Circuits Jr. instruction manual in PDF format for easy access and portability. Download directly from the Elenco Electronics website or trusted online repositories. Ensure compatibility with your device for optimal viewing. Save the file for offline use, allowing project exploration without an internet connection. Enjoy convenient learning!
Online Resources and Support
Access a wealth of Snap Circuits Jr. support through online communities and forums. Find troubleshooting tips, project variations, and answers to frequently asked questions. Explore video tutorials demonstrating circuit building techniques. Visit the Elenco Electronics website for additional resources and contact information. Connect with fellow enthusiasts for collaborative learning and inspiration!

Project Variations and Experimentation
Unleash your creativity by exploring alternative component arrangements within existing projects. Modify circuits to observe changes in functionality and understand circuit behavior. Experiment with different resistor values to alter LED brightness or sound volume. Expand upon provided designs, adding new components to create unique inventions. Document your modifications and discoveries!
Alternative Component Arrangements
Discover how rearranging components impacts circuit function without altering the core design. Explore different placements of resistors, LEDs, and transistors to observe subtle changes. Experiment with series versus parallel configurations for enhanced understanding. Note that parts can be arranged differently while maintaining circuit integrity. Document these variations!
Expanding on Existing Projects
Challenge yourself by modifying completed projects! Introduce additional components – resistors, LEDs – to observe altered behaviors. Combine elements from different projects for innovative circuits. Consider adding a phototransistor (Q4) to existing designs, observing light sensitivity. Document all modifications and their effects. Explore beyond the manual’s instructions!
Suggested Reading and Further Learning
Deepen your understanding with “Electronics for Kids” by Øyvind Nydal Dahl, a fantastic resource for young enthusiasts. Explore additional circuit-building resources online and in libraries. Consider introductory electronics workbooks for supplemental learning. Utilize online PDF guides and tutorials. Continue experimenting and building – the best learning comes from hands-on practice!
Electronics for Kids by Øyvind Nydal Dahl
Øyvind Nydal Dahl’s book provides a solid foundation in basic electronics principles, complementing the Snap Circuits experience. It explains concepts clearly, making it accessible for young learners. The book encourages experimentation and problem-solving, fostering a deeper understanding of circuitry. It’s a valuable resource for expanding knowledge beyond the kit’s projects.
Additional Resources for Circuit Building
Beyond the Snap Circuits kit and recommended books, numerous online resources enhance learning. Websites offer circuit simulations, project ideas, and troubleshooting guides. Explore educational videos demonstrating electronic principles and building techniques. Online forums connect with fellow enthusiasts, fostering collaboration and knowledge sharing. These resources expand understanding and inspire further experimentation.
Snap Circuits Jr. Select: Differences and Compatibility

The Snap Circuits Jr; Select kit offers expanded project options, building upon the foundational SC-100. Its instruction manual, available as a PDF, details unique components and circuit designs. Compatibility exists, allowing integration of parts from different Snap Circuits sets, broadening experimentation. However, ensure proper voltage and component matching for safe operation.
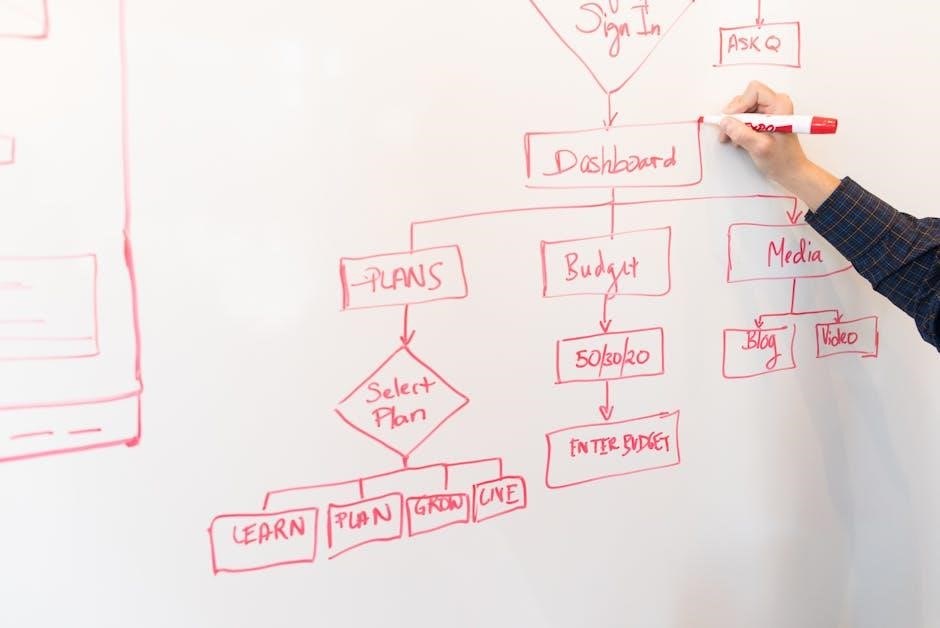
Understanding Circuit Diagrams
Snap Circuits Jr. utilizes simplified diagrams for easy comprehension; Schematic symbols represent components, guiding project assembly step-by-step. Following these diagrams precisely is crucial for successful circuit building. The manual provides clear visual instructions, ensuring even beginners can interpret and replicate the designs. Understanding these diagrams unlocks further experimentation and customization.
Interpreting Schematic Symbols
Snap Circuits Jr. employs distinct symbols for each component. Resistors, LEDs, and transistors all have unique representations within the diagrams. Recognizing these symbols is key to understanding circuit functionality. The instruction manual details each symbol’s meaning, enabling accurate component placement. Mastering this skill allows for independent circuit design and troubleshooting.
Following Project Diagrams Step-by-Step

Each project within the Snap Circuits Jr. manual features a clear, visual diagram. Carefully follow each step, ensuring correct component placement on the base grid. Pay attention to wire connections and component orientation. The diagrams illustrate the exact layout needed for successful circuit operation. Refer to the parts list to verify component identification before snapping.