canon t50 user manual

Canon T50 User Manual⁚ A Comprehensive Guide

Welcome to the definitive guide for your Canon T50 film SLR camera! This comprehensive resource will provide you with everything you need to know‚ from loading film and batteries to understanding its programmed auto exposure mode. Discover how to maximize your T50’s capabilities and take stunning photographs.

The Canon T50‚ released in March 1983‚ represents Canon’s foray into simplifying SLR photography. Aimed at users transitioning from point-and-shoot cameras‚ the T50 combined the versatility of an SLR with user-friendly automation. The camera boasted a built-in power winder‚ offering continuous shooting at 1.4 frames per second‚ a feature previously found in higher-end models.

Its primary mode of operation was Programmed Auto Exposure (AE)‚ making it exceptionally easy to use. The T50 accepted Canon’s FD mount lenses‚ providing access to a wide range of optics. While it lacked manual controls found in other Canon SLRs‚ the T50 offered a straightforward approach to capturing images‚ perfect for beginners.

Designed for ease of use‚ the T50 prioritized automation‚ simplifying the photographic process. Its accessible design made SLR photography available to a broader audience. While advanced photographers might miss manual adjustments‚ the T50’s simplicity and built-in features made it a popular choice for casual users exploring the world of film photography. The camera’s design reflects the era’s focus on user-friendliness and automation.

Canon T50⁚ Key Features and Specifications

The Canon T50 boasts several features that defined its appeal. Its primary selling point was the Programmed AE mode‚ which automatically selected the optimal aperture and shutter speed for correctly exposed images. The built-in power winder allowed for continuous shooting at approximately 1.4 frames per second‚ enabling capturing action sequences.

The T50 used Canon’s FD lens mount‚ compatible with a vast range of lenses. The camera accepted film speeds from ISO 25 to 1600‚ providing versatility in different lighting conditions. The shutter speed ranged from 2 seconds to 1/1000th of a second. The T50 required two AA batteries to operate.

Other key features included a self-timer and a viewfinder that displayed essential shooting information. The camera lacked manual exposure controls‚ focusing on automated operation. The T50’s specifications reflect its design as an accessible and user-friendly SLR. Its automated features and compatibility with FD lenses made it a popular choice for amateur photographers seeking ease of use. The T50 offered a simple yet capable entry point into the world of SLR photography.

Loading Film and Batteries

To begin using your Canon T50‚ you’ll need to load both film and batteries. Start by opening the camera back by gently pulling up on the film rewind knob located on the top left of the camera. Once the back is open‚ insert a fresh roll of 35mm film into the film chamber‚ ensuring the film canister sits securely.

Next‚ pull the film leader across the camera body and insert it into one of the slots on the take-up spool. Advance the film using the film advance lever until the sprocket holes on the film engage with the sprockets on the camera. Close the camera back securely.

The Canon T50 requires two AA batteries‚ which are inserted into the battery compartment located on the camera’s base. Ensure the batteries are inserted with the correct polarity‚ as indicated inside the compartment. Once the batteries are installed‚ close the battery door. After loading both film and batteries‚ you are ready to start shooting.

Understanding the Programmed Auto Exposure (AE) Mode

The Canon T50 shines with its Programmed Auto Exposure (AE) mode‚ designed for simplicity and ease of use. In this mode‚ the camera automatically selects the optimal aperture and shutter speed combination for the current lighting conditions‚ allowing you to focus solely on composition and capturing the moment.

To engage the Programmed AE mode‚ ensure the lens aperture ring is set to the “A” position. This indicates that the lens is under the camera’s electronic control. Next‚ simply point the camera at your subject and press the shutter button halfway to activate the metering system. The camera will then calculate and set the appropriate exposure settings.

When the lighting is too dim‚ the camera will display a “P” warning in the viewfinder‚ indicating that a longer exposure time or brighter lighting is needed. In most situations‚ the Programmed AE mode delivers excellent results‚ making it ideal for everyday photography.

Using FD Lenses with the Canon T50

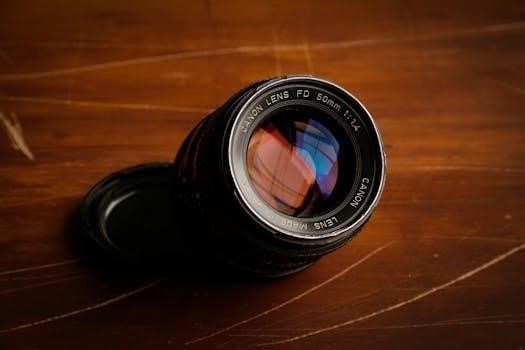
The Canon T50 utilizes the Canon FD lens mount‚ providing access to a wide array of excellent lenses. These lenses are renowned for their sharpness and image quality. To attach an FD lens‚ align the red dot on the lens with the red dot on the camera body. Then‚ rotate the lens clockwise until it clicks into place.

To remove the lens‚ press the lens release button located on the camera body near the lens mount. While holding the button‚ rotate the lens counterclockwise until it detaches from the camera.

It’s important to note that FL series lenses and other lenses without AE signal pins are not fully compatible with the T50’s Programmed AE mode. When using such lenses‚ manual exposure settings may be necessary for optimal results; The T50’s versatility with FD lenses enhances its capabilities.

Troubleshooting Common Issues⁚ The “P” Warning

One of the most frequent concerns encountered by Canon T50 users is the flashing “P” warning in the viewfinder. This indicates that the camera’s programmed auto exposure (AE) mode determines that the lighting conditions are insufficient for proper exposure with the current lens aperture and film speed. This often happens even in seemingly well-lit environments.

Several factors can trigger this warning. Firstly‚ ensure that the film speed (ISO) setting on the camera matches the film loaded. Secondly‚ check the lens aperture ring is set to “A” for automatic. If the “P” warning persists‚ it could indicate a malfunctioning light meter or a dirty lens contact. Try cleaning the lens contacts with a soft‚ dry cloth.

If the problem continues despite these steps‚ consider that the meter needs professional servicing.

Manual Mode Override (If Applicable)

The Canon T50 is primarily known for its programmed auto-exposure (AE) mode‚ designed for simplicity and ease of use. However‚ some users may seek a degree of manual control over exposure settings. While the T50 doesn’t offer a fully manual mode in the traditional sense‚ there are limited ways to influence the exposure beyond the programmed AE.

One method involves using lenses with aperture rings and setting them off the “A” setting‚ which allows the control of the aperture manually. Be aware that the camera’s light meter won’t function in this mode‚ requiring the user to estimate exposure based on experience or by using an external light meter.

Experiment with different settings and carefully observe the resulting images to develop an understanding of how aperture affects exposure.

Built-in Power Winder⁚ Continuous Shooting

One of the standout features of the Canon T50 is its integrated power winder‚ providing the convenience of automated film advance and continuous shooting capabilities. This eliminates the need for manual film winding after each shot‚ allowing you to focus on capturing the perfect moment.

The built-in power winder enables continuous shooting at a rate of approximately 1.4 frames per second. This is particularly useful for capturing action shots‚ sports events‚ or sequences of movement. To activate continuous shooting‚ simply hold down the shutter button after taking the first shot. The camera will automatically advance the film and continue taking pictures until you release the shutter button.

The power winder is powered by the same AA batteries that operate the camera. The T50’s power winder makes it easy to take photos.

Available Accessories for the Canon T50

To enhance the capabilities and versatility of your Canon T50‚ a range of accessories were available. These accessories allowed photographers to tailor their T50 to specific shooting needs and creative preferences.

One of the most popular accessories was the Canon Speedlite flash units. These external flashes provided more power and control over lighting than the T50’s built-in flash‚ allowing for better-illuminated photos in low-light situations. Various Speedlite models were compatible with the T50‚ offering different guide numbers and features.

Canon FD lenses were a crucial accessory‚ offering a wide array of focal lengths and apertures. This allowed photographers to adapt to diverse shooting scenarios.

Other accessories included lens hoods‚ filters‚ and close-up lenses. These accessories helped optimize image quality and expand creative possibilities. A motor drive unit can make the T50 faster.

Maintaining Your Canon T50

Proper maintenance is crucial to ensure your Canon T50 continues to deliver reliable performance and stunning images for years to come. Regular cleaning is essential; use a soft‚ lint-free cloth to gently wipe the camera body‚ lens surfaces‚ and viewfinder. Avoid using harsh chemicals or abrasive materials‚ as these can damage the camera’s delicate components.

Protect your T50 from dust‚ moisture‚ and extreme temperatures. Store it in a cool‚ dry place when not in use‚ and consider using a camera bag for added protection during transport. If the camera gets wet‚ dry it immediately with a clean cloth and allow it to air dry completely before storing.
Periodically check the battery contacts for corrosion and clean them with a cotton swab dipped in isopropyl alcohol if necessary. Replace the batteries when they are low to prevent leakage‚ which can damage the camera’s internal circuitry.

Finding a PDF Version of the User Manual

Locating a digital copy of the Canon T50 user manual can be incredibly helpful for quick reference and troubleshooting. Several online resources offer PDF versions of the manual for free download. A simple web search using terms like “Canon T50 manual PDF” or “Canon T50 user guide” will yield numerous results.

Websites specializing in camera manuals‚ such as cameramanuals.org and photo-manuals.com‚ are excellent places to start your search. These sites often have extensive libraries of vintage camera manuals available for download. Be sure to verify the source of the PDF to ensure it is a legitimate and complete version of the manual.

Another option is to check Canon’s official website or online forums dedicated to Canon cameras. These resources may provide links to the official manual or offer assistance in locating a reliable digital copy. Having a PDF version allows you to access the manual on your computer‚ tablet‚ or smartphone‚ making it a convenient companion for your Canon T50.

Understanding the Canon T50 Service Manual

The Canon T50 service manual is a detailed technical document intended for experienced camera technicians and repair professionals. Unlike the user manual‚ which focuses on basic operation and features‚ the service manual provides in-depth information on the camera’s internal components‚ circuitry‚ and repair procedures.

This manual typically includes diagrams‚ schematics‚ and step-by-step instructions for disassembling‚ troubleshooting‚ and reassembling the Canon T50. It may also contain information on calibration procedures and parts lists. Due to its technical nature‚ the service manual is not recommended for casual users or those without prior experience in camera repair.

Attempting to repair a Canon T50 without the proper knowledge and tools can result in further damage to the camera. If you are experiencing issues with your T50‚ it is best to consult a qualified camera repair technician who has access to the service manual and the necessary expertise to diagnose and fix the problem.

Canon T50 vs. Other Canon FD Cameras (T70‚ T90)

The Canon T50‚ T70‚ and T90 represent different points in Canon’s FD-mount camera evolution‚ each offering distinct features and capabilities. The T50‚ aimed at ease of use‚ featured a programmed auto-exposure mode and a built-in power winder‚ simplifying the shooting process. In contrast‚ the T70 expanded on this with multiple program modes‚ offering greater control over exposure settings while maintaining user-friendliness.

The T90‚ however‚ stood as the flagship FD camera‚ boasting advanced features like multi-metering modes‚ sophisticated controls‚ and a more robust build quality. While the T50 was primarily designed for simplicity‚ the T70 aimed for a balance between automation and creative control. The T90 catered to experienced photographers demanding precision and versatility.

Choosing between these cameras depends on your photographic needs and skill level. The T50 is perfect for beginners‚ the T70 offers a good middle ground‚ and the T90 is ideal for advanced users seeking maximum control.

bruno sre 2010 installation manual

The Bruno SRE-2010 Electra-Ride Elite stairlift is a premium solution designed for straight staircases, offering a blend of safety, reliability, and aesthetic appeal. It ensures smooth and comfortable access between different levels of your home, promoting independence for users with mobility challenges. This model is known for its robust construction and user-friendly operation, making it a popular choice for home accessibility.

Overview of the Bruno SRE-2010 Model

The Bruno SRE-2010, part of the Electra-Ride Elite series, is a straight rail stairlift designed for indoor use. It provides a dependable solution for individuals needing assistance navigating stairs within their homes. This model is engineered with a focus on user safety and comfort, featuring a plush, generously-sized seat with multiple height adjustments. The SRE-2010 boasts a 400-pound lift capacity, ensuring it can accommodate a wide range of users. Its offset swivel seat enhances user convenience by allowing for safer and easier entry and exit from the lift, with rotation up to ninety degrees. The stairlift is equipped with an armrest rocker switch for straightforward operation and includes safety obstruction sensors. Manufactured in Wisconsin, USA, the SRE-2010 exemplifies Bruno’s commitment to quality and durability. Its design allows it to blend into home environments seamlessly, providing a practical and aesthetically pleasing solution for stair access.

Key Features of the SRE-2010

The Bruno SRE-2010 boasts a 400-pound lift capacity, an offset swivel seat for safe entry and exit, and obstruction sensors for enhanced safety. It also features a comfortable, adjustable seat and user-friendly controls.

400-Pound Lift Capacity

The Bruno SRE-2010 stairlift is engineered with a robust 400-pound lift capacity, providing a reliable and secure solution for a wide range of users. This significant weight limit ensures that the stairlift can accommodate individuals of varying sizes and needs, offering peace of mind regarding its structural integrity and dependable performance. The design of the SRE-2010 takes into account both the user’s comfort and safety, and the substantial lift capacity is a key element in achieving that goal. This feature contributes to its reputation as a high-quality, heavy-duty stairlift capable of meeting the demands of daily use. The specified weight capacity should not be exceeded to ensure safe operation. Furthermore, the 400-pound limit demonstrates the stairlift’s solid construction and ability to handle consistent use. This makes the Bruno SRE-2010 a dependable option for those seeking a durable and reliable mobility solution that can stand up to the rigors of daily activity. It allows users to confidently use the lift without concern about exceeding its weight limitations, therefore enhancing their overall experience.

Offset Swivel Seat Functionality

The Bruno SRE-2010 stairlift features an offset swivel seat, a crucial design element that enhances user safety and convenience. This functionality allows the seat to rotate up to ninety degrees, and extends away from the staircase, making it easier and safer to get on and off the lift. The offset design ensures that the user can comfortably transfer to and from the seat without any awkward or potentially dangerous movements. This swivel function is especially beneficial in tight spaces, as it allows the user to exit the lift in a more open area. The seat can lock in various positions, typically at 0, 60, and 90 degrees at the top, and 45 degrees at the bottom, providing further flexibility and ease of use. The smooth operation of the swivel mechanism contributes to a secure and comfortable ride. This thoughtful design feature demonstrates the commitment to user-centric innovation, making the Bruno SRE-2010 stairlift a user-friendly and reliable option for individuals seeking improved mobility. It ensures that every aspect of the stairlift supports the user’s safety and comfort.

Safety Obstruction Sensors

The Bruno SRE-2010 stairlift incorporates highly responsive safety obstruction sensors, a critical safety feature designed to protect both the user and the stairlift itself. These sensors are strategically positioned to detect any obstacles in the path of the stairlift during its operation. If an obstruction is detected, such as a misplaced object or a person, the sensors will immediately stop the stairlift to prevent potential accidents or damage. This immediate stop ensures that the lift does not continue to move and potentially cause harm. The sensitivity of these sensors is finely tuned to ensure that they react quickly and reliably to any unexpected obstacles. This feature provides peace of mind to the user, knowing that the stairlift will halt its movement if anything is in its way. The reliable safety obstruction sensors are an integral part of the overall safety design, making the Bruno SRE-2010 a dependable and secure mobility solution. This ensures the user’s wellbeing and the longevity of the stairlift.

Installation Process

Proper installation is crucial for the safe and effective operation of the Bruno SRE-2010 stairlift. It is vital to adhere to the manufacturer’s guidelines and the installation manual for accurate setup. This ensures the lift functions as designed and reduces any potential risks.

Importance of the Installation Manual

The Bruno SRE-2010 installation manual is an essential document that provides step-by-step instructions for the correct assembly and setup of the stairlift. It is not merely a suggestion but a crucial guide that ensures the safe and optimal performance of the equipment. The manual contains detailed diagrams, specifications, and safety protocols that must be followed precisely. Neglecting to consult the manual could lead to improper installation, potentially causing malfunctions, safety hazards, or voiding the warranty. It also outlines the necessary checks and adjustments required after installation to guarantee smooth and reliable operation. Furthermore, the manual acts as a point of reference for troubleshooting any issues that may arise during or after the installation. Understanding and utilizing the installation manual is critical for anyone involved in setting up the Bruno SRE-2010 stairlift, as it contributes directly to the user’s safety and the equipment’s longevity. It also ensures that all the features of the stairlift are operational and aligned correctly to the specific staircase.

Step-by-Step Installation Guidelines

The installation of the Bruno SRE-2010 stairlift involves a series of precise steps that must be followed to ensure safety and functionality. The process begins with the careful unpacking of all components and verifying against the parts list in the installation manual. The next stage involves securing the rail to the staircase, ensuring it’s properly aligned and anchored for stability. Then, the drive unit and carriage are attached to the rail, followed by the installation of the seat assembly and footrest. Electrical connections are made according to the manual’s specifications, which includes checking the wiring of the safety sensors and controls. Finally, there is a series of tests to make sure the lift operates smoothly, that the seat swivels correctly, and that the safety features are all functional. The manual offers detailed instructions for each step, which is a must for a successful installation. Always refer to the manual for specific torque settings and other important details.

Operation and Maintenance

Proper operation of the Bruno SRE-2010 involves understanding the controls and safety features. Regular maintenance, including inspection and cleaning, is essential for optimal performance and longevity. Refer to the operator’s manual for detailed guidelines. Bruno authorized dealers provide service.

Operator Manual Overview

The operator manual for the Bruno SRE-2010 stairlift is a crucial resource for users, providing comprehensive guidance on the safe and effective operation of the unit. This manual details the functions of all controls, including the armrest rocker switch for easy movement, and explains how to use the offset swivel seat, which rotates up to ninety degrees for safe boarding and disembarking. The manual also includes important safety information, such as the purpose of the obstruction sensors, which halt the lift if an obstacle is detected. It outlines the proper procedures for starting, stopping, and maneuvering the stairlift, ensuring a secure and comfortable ride. Additionally, the manual covers essential troubleshooting steps and provides information on how to contact a Bruno dealer for support or maintenance needs. It’s vital for all users to familiarize themselves with the contents of this manual to fully understand their stairlift and to use it safely and effectively. Understanding the manual also helps in identifying any issues that may arise and how to address them promptly. The operator manual serves as a constant reference for ensuring the stairlift operates as designed and provides safe and dependable service.

Regular Inspection and Maintenance

Regular inspection and maintenance are essential to ensure the Bruno SRE-2010 stairlift operates safely and reliably. Users should periodically examine the stairlift for any signs of wear, loose parts, or damage. This includes checking the seat assembly, the armrest controls, and the track. It is also important to inspect the painted surfaces for scratches and to touch them up as necessary to prevent corrosion. Lubrication of moving parts is a critical aspect of regular maintenance. This should be done according to the manufacturer’s recommendations, which are typically found in the operator’s manual. Additionally, the obstruction sensors should be tested regularly to confirm they are functioning correctly. It is highly recommended to contact a Bruno authorized dealer annually for a professional examination, cleaning, and lubrication of the stairlift. These inspections will catch any potential issues early, preventing more significant problems from developing. Proper maintenance not only ensures the longevity of the lift but also guarantees the safety and comfort of its users. Regular checks and professional servicing are key to maintaining the stairlift’s optimal performance.

Warranty Information and Authorized Dealers

The Bruno SRE-2010 stairlift comes with a warranty that protects the original purchaser against defects in materials and workmanship. It is crucial to review the specific terms and conditions of your warranty, which will outline the coverage period and any limitations. Typically, the warranty covers major components of the stairlift but may not include optional equipment. Labor for addressing defects is often covered for a limited period, such as the first thirty days after installation, provided the installation was performed by a Bruno Authorized Dealer. To ensure your warranty remains valid, it is essential to have any service or repairs carried out by a Bruno Authorized Dealer. These dealers have been trained on the proper maintenance and repair procedures for the stairlift. Contacting an authorized dealer not only ensures compliance with the warranty requirements but also provides access to qualified technicians who are knowledgeable about the specific details of the SRE-2010. Furthermore, authorized dealers can provide genuine Bruno parts, which are important for maintaining the integrity of the stairlift. For any warranty-related questions or service concerns, always reach out to your local Bruno authorized dealer. They are the best resource for ensuring your stairlift remains in optimal condition.

Additional Resources

For further assistance, access manuals and support through the official Bruno website, or by contacting authorized dealers. These resources provide valuable information, including installation instructions, troubleshooting guides, and warranty details, ensuring optimal use of your stairlift.

Accessing Manuals and Support

To ensure a seamless experience with your Bruno SRE-2010 stairlift, accessing the correct manuals and support is crucial. The primary resource for this is the official Bruno website, where you can find digital versions of the operator’s manual, installation guides, and technical specifications. These documents are usually available in PDF format, allowing for easy downloading and printing. Additionally, the website often features a dedicated support section with FAQs and contact details for customer service. For more personalized assistance, reaching out to a Bruno authorized dealer is recommended. Dealers can provide expert advice, answer specific questions, and offer on-site support if needed. They are also equipped to handle any warranty-related issues and can guide you through the maintenance requirements. Furthermore, some online platforms may host user forums where you can find tips from other SRE-2010 users. Always verify that the information obtained from these sources is accurate and up-to-date.

Contacting Bruno Dealers for Service

For any service needs related to your Bruno SRE-2010 stairlift, reaching out to an authorized Bruno dealer is the most reliable approach. These dealers are trained professionals equipped to handle a wide range of issues, from routine maintenance to complex repairs. To locate a dealer, you can typically use the dealer locator tool on the official Bruno website, which allows you to search based on your location. When contacting a dealer, it’s helpful to have your stairlift’s model number and serial number handy, as this will assist them in providing accurate service and support. Additionally, be prepared to describe the issue you are experiencing in detail. Bruno dealers offer a variety of services, including installation, troubleshooting, parts replacement, and annual inspections. They also handle warranty claims and can provide guidance on proper stairlift usage. Remember to keep records of any service work done to your stairlift and always insist on using genuine Bruno parts.

cda practice test 65 questions pdf

CDA Exam Overview

The CDA exam, a computer-based test, features 65 multiple-choice questions; 60 standard questions and 5 scenario-based questions incorporating narratives and images. Candidates are allotted 1 hour and 45 minutes to complete the exam, requiring only basic computer mouse skills for navigation. The exam assesses knowledge of best practices in early childhood education. Numerous practice tests, available in PDF format, can aid in preparation.

Exam Format and Structure

The CDA exam is a computer-based test administered through PearsonVUE. It consists of 65 multiple-choice questions designed to evaluate a candidate’s understanding of early childhood education best practices. The question types include standard multiple-choice questions and scenario-based questions, which present a short narrative and a photograph requiring analysis and application of knowledge. Candidates have 1 hour and 45 minutes to complete the exam. Basic computer skills, specifically the ability to use a mouse to navigate and select answers, are required. No other specialized computer skills are necessary to successfully complete the assessment. The exam is divided into sections, although the exact number and content of those sections are not explicitly detailed in the provided text.

Scheduling the CDA Exam

Scheduling your CDA exam is a straightforward process. After applying to the Council for Professional Recognition and receiving a “Ready to Schedule” notice, you can proceed. Two scheduling methods are available. One option is scheduling directly through the PearsonVUE website. Testing times and locations are allocated on a first-come, first-served basis. It’s crucial to note that there is no additional fee for scheduling the exam itself. Remember to check the PearsonVUE website for available testing dates and locations in your area. Ensure you have your application details and confirmation ready before you begin the scheduling process to streamline the procedure and secure your preferred testing date and time. Planning ahead is recommended due to the availability being on a first-come, first-served basis.

Exam Content and Topics

The CDA exam comprehensively evaluates your understanding of best practices in early childhood education. The 65 multiple-choice questions cover a wide range of topics essential for effective childcare. Expect questions focusing on child development, appropriate learning environments, curriculum planning, and effective teaching strategies. Assessment also includes scenario-based questions, presenting realistic situations requiring application of knowledge. These scenarios often involve interactions with children, parents, or colleagues, testing your problem-solving and decision-making skills in practical contexts. A strong grasp of child psychology, developmental milestones, and effective communication techniques is vital for success. Thorough preparation covering these areas ensures confidence when facing the exam’s diverse content. Reviewing relevant resources and utilizing practice tests can significantly enhance your understanding of the exam’s scope and improve your performance.

Preparing for the CDA Exam

Effective preparation is key to success. Utilize practice tests and effective study strategies to thoroughly understand the CDA process and confidently approach the exam. Many resources are available to assist your preparation.

Utilizing Practice Tests

Practice tests are invaluable tools for CDA exam preparation. Numerous resources offer practice tests in PDF format, often mirroring the actual exam’s format and question style. These tests allow you to familiarize yourself with the question types and assess your strengths and weaknesses. By identifying areas needing improvement, you can focus your study efforts effectively. The timed nature of practice tests simulates the real exam environment, helping you manage your time efficiently during the actual assessment. Remember, consistent practice is crucial for building confidence and improving your performance. Analyzing your answers and understanding the rationale behind correct responses further enhances learning and retention. Don’t limit yourself to a single practice test; utilize multiple resources to maximize your preparation and achieve a comprehensive understanding of the material. Regular practice will significantly boost your chances of success on the CDA exam.

Effective Study Strategies

Effective study strategies are crucial for success on the CDA exam. Create a structured study plan, allocating specific time slots for reviewing different exam topics. Active recall techniques, such as flashcards or self-testing, are highly beneficial for knowledge retention. Focus on understanding core concepts rather than rote memorization. Utilize a variety of learning resources, including textbooks, online materials, and practice tests. Join study groups to discuss challenging topics and share perspectives. Regular breaks and sufficient sleep are essential to maintain focus and prevent burnout. Practice applying your knowledge through simulated scenarios, similar to those encountered in the exam. Seek feedback on your progress and adjust your study plan accordingly. A consistent and well-organized approach maximizes your chances of achieving a high score on the CDA exam. Remember that effective studying is a personalized process; adapt strategies to suit your learning style.

Understanding the CDA Process

The CDA credentialing process involves several key stages. Initially, candidates must thoroughly prepare by studying relevant materials and acquiring the necessary skills and knowledge in early childhood education. Following preparation, the application process begins, requiring submission of the necessary documentation and fees to the Council for Professional Recognition. The next step involves demonstrating competency through the completion of a portfolio and the CDA exam. Upon successfully completing the exam and verification visit, candidates earn the CDA credential. This certification needs renewal, typically requiring maintaining continued professional development and ongoing commitment to early childhood education best practices. Understanding each stage of this process is essential for effective planning and successful credential attainment. Familiarize yourself with the requirements and timelines for each step to streamline the journey towards CDA certification.

CDA Practice Test Resources

Numerous CDA practice tests are available online and in PDF format. These resources offer various question formats and help candidates prepare for the exam’s structure and content. Utilizing these resources effectively can significantly enhance exam readiness.

Accessing Practice Test PDFs

Locating CDA practice test PDFs can be achieved through various online channels. Many websites dedicated to early childhood education resources offer free or paid downloadable practice exams. These PDFs often mirror the format and question style of the actual CDA exam, providing valuable familiarity. Some websites specialize in test preparation materials and offer comprehensive packages including practice tests, study guides, and other helpful resources. It’s advisable to check reviews and compare options before downloading to ensure the quality and relevance of the practice test. Remember to always verify the source’s credibility and look for updated versions to reflect current exam content. Searching terms like “CDA practice test PDF download” or “CDA exam prep PDF” will yield numerous results. Be aware that some PDFs may be outdated; always check for recent publication dates to ensure accuracy. Careful selection of reputable sources can greatly improve your preparation for the CDA exam.

Different Practice Test Formats

CDA practice tests are available in a variety of formats to suit different learning styles and preferences. Many are offered as downloadable PDFs, allowing for offline study and convenient printing. These PDFs often include answer keys for immediate feedback and self-assessment. Online practice tests provide a simulated exam experience, replicating the timing and interface of the actual computer-based test. Some online platforms offer adaptive testing, adjusting the difficulty based on individual performance. Interactive practice tests might incorporate multimedia elements like videos or images, enhancing engagement and practical application of knowledge. Additionally, some resources might offer practice tests bundled within comprehensive study guides or workbooks, providing a more integrated learning experience. The choice of format depends on individual needs and learning style; exploring a combination of formats can provide a well-rounded approach to exam preparation.

Utilizing Online Resources

The internet offers a wealth of resources for CDA exam preparation beyond simple practice tests. Numerous websites provide comprehensive study materials, including detailed explanations of key concepts and practice questions categorized by topic. Online forums and communities dedicated to the CDA credential offer a platform for interaction with other candidates, sharing study tips, and addressing common concerns. Interactive online courses can provide structured learning paths, often incorporating video lectures, quizzes, and simulated exam environments. These online courses frequently offer personalized feedback and progress tracking, assisting candidates in identifying areas needing improvement. Remember to critically evaluate the credibility and reliability of online resources before incorporating them into your study plan. Look for resources from reputable organizations or experienced educators in the field of early childhood education to ensure accurate and up-to-date information.

Understanding the CDA Credential

The Child Development Associate (CDA) credential is widely recognized in early childhood education, signifying competency and commitment to high-quality care. Certification demonstrates dedication to professional development and enhances career prospects.

Importance of CDA Certification

Earning a CDA credential significantly boosts a childcare professional’s credibility and marketability. It demonstrates a commitment to ongoing professional development and a dedication to providing high-quality care for children. Many employers prefer or require CDA certification, increasing job opportunities and potentially leading to higher salaries. The CDA credential showcases a solid foundation in early childhood education theory and best practices. This certification distinguishes individuals as knowledgeable and capable professionals within a competitive field. Parents often seek out caregivers with CDA certification, trusting their expertise and commitment to their child’s well-being. This recognition enhances a caregiver’s reputation and attracts more families seeking reliable and qualified care. The CDA stands as a mark of excellence and professionalism within the industry, setting certified individuals apart from their peers.

Career Advancement Opportunities

Holding a CDA credential opens doors to numerous career advancement opportunities within the early childhood education field. Certified individuals may qualify for supervisory roles, such as program directors or center managers, overseeing staff and program operations. The CDA can serve as a stepping stone to further education, such as pursuing a bachelor’s or master’s degree in early childhood education, enhancing career prospects and earning potential. Some programs may offer higher salaries and benefits to CDA-certified employees, recognizing their increased skills and expertise. The certification can also lead to opportunities for professional development, including workshops, conferences, and advanced training, fostering continuous growth within the field. CDA certification demonstrates a dedication to the profession, showcasing a commitment to ongoing learning and skill enhancement, making certified individuals more competitive in the job market. Career progression, increased responsibility, and enhanced earning potential are all within reach for those who hold the CDA credential.

Renewal of CDA Certification

Maintaining your CDA certification involves a renewal process to ensure continued competency and adherence to evolving best practices in early childhood education. The specific requirements and timeframe for renewal may vary, so it’s crucial to consult the official Council for Professional Recognition website for the most up-to-date information. Generally, renewal involves demonstrating continued professional development through participation in professional training, workshops, or conferences. This ongoing commitment to professional growth ensures that CDA-certified individuals remain current with the latest research and advancements in the field. Documentation of these activities is usually required as part of the renewal application. Failing to renew your certification within the designated timeframe will result in the lapse of your credential, requiring you to retake the exam to regain certification. Proactive planning and adherence to the renewal guidelines are essential for maintaining your CDA credential and the benefits it provides.